

Tomytec produces a line of static N-scale train models, named the Tetsudo Collection (aka Railway Collection) aimed at the collector who is not necessarily interested in running trains, but who nonetheless is interested in collecting replicas. And the collection is quite extensive.
Naturally, being static models, their price point is significantly lower than Tomytec’s Tomix line of (operable) trains, since there’s no need for the motor, or even metal wheels for electrical pickup.
| Static Model |
 |
| The static model, complete with plastic track. Looks fine, but it won’t go anywhere except under 0-5-0 power. |
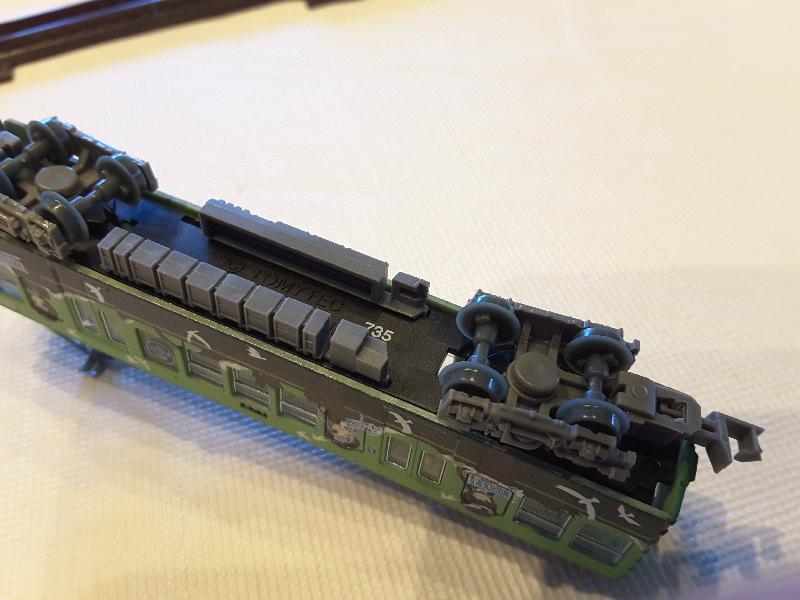 |
| A look at the dark side: being static, the wheels and trucks are plastic, there’s no weight, and no motor. |
 |
| But if you want to motorize, there’s info on the back of the box. |
Unpleasant Surprise; Happy Ending
A few years ago, I unwittingly bought a Tetsudo Collection model, not realizing it was static, and, well, it sat in the cabinet for a long time until I discovered that Tomytec also sells power unit kits to convert those static models into operable trains.
The conversion is fairly easy—enough so that you don’t need to learn Japanese to read the directions—and the result is a pretty decent working model.
Our Conversion
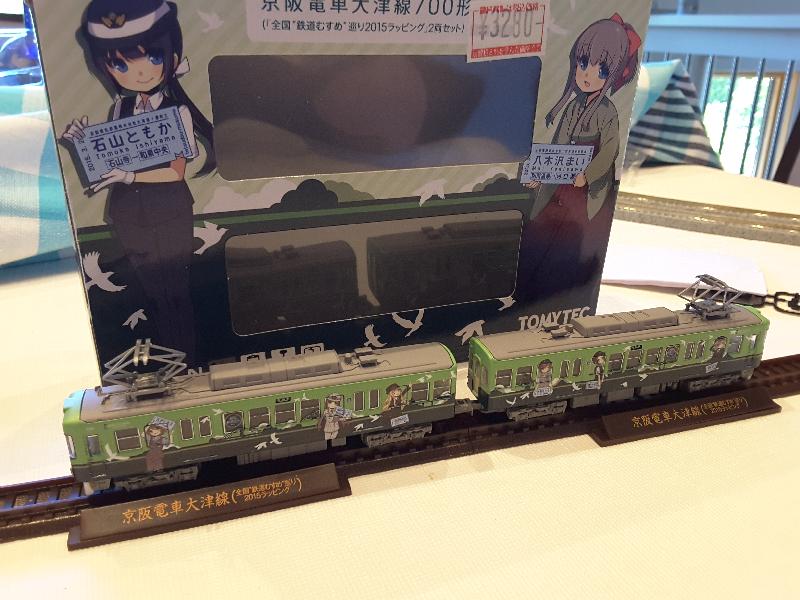
Last summer, when taking my daughter with me to Akihabara Yodobashi for some last minute purchases, one particular Tetsudo Collection model—the Tetsudo Musume ad-wrap Keihan Type 700—caught her eye, so I put it into the basket.
By the way, when planning to motorizing one of these, you need to know what kit to use: there are a number of kits available, and they vary in both of the wheelbase length and wheel diameter. If motorizing is possible (not every kit is, it seems) you’ll see the information on the back of the box. TM kits are motorized, and TT kits are not: they’re just weighted trailers.
In my daughter’s case, we needed a TM-20 and a TT-04R, so I put those in the basket, too.
| Parts is Parts |
 |
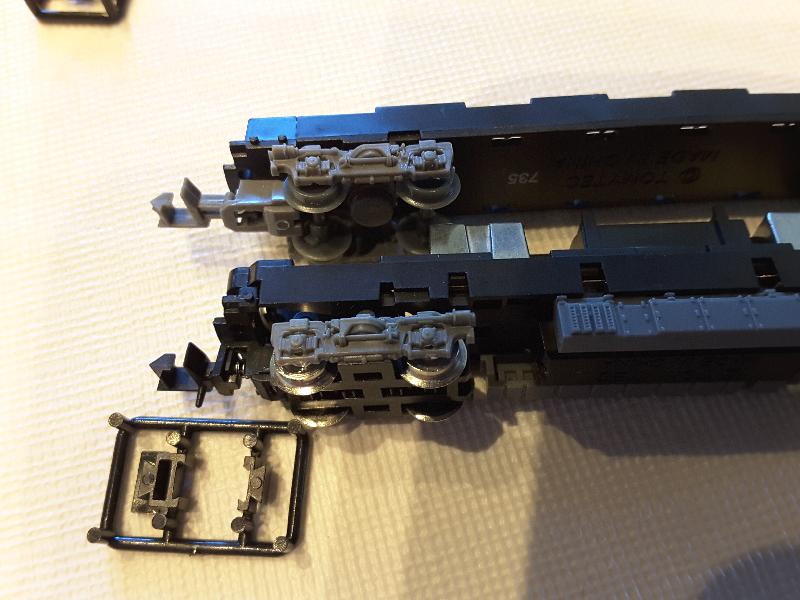
| Comparing Chassis |
 |
| Matching Things Up |
 |
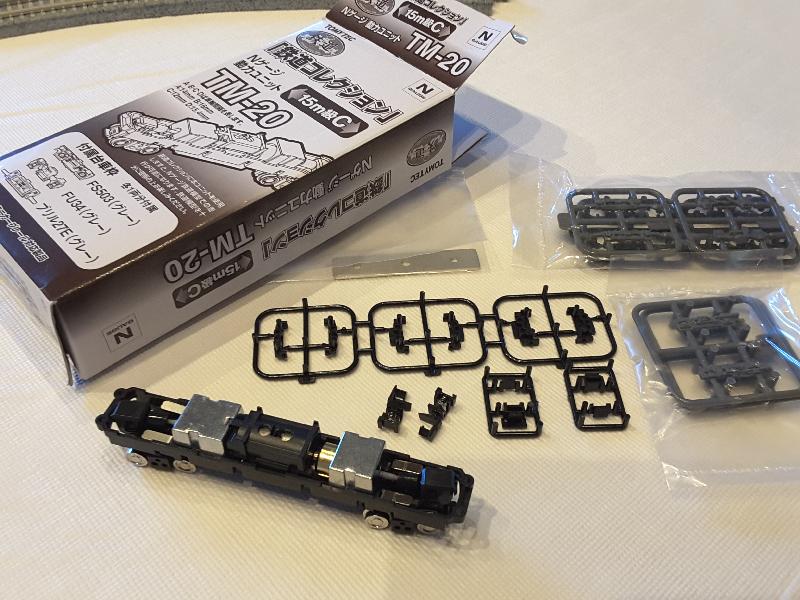
Conversion time. Let’s begin by seeing what’s in the TM kit. Clockwise from left: the motorized chassis (note the hefty brass flywheel, and equally hefty weights) a sprue of three different length chassis extenders, extra weight (in bag), choice of truck frames (in bags), two sprues of coupler extensions, and finally, operable Arnold couplers.
As you can see, the only tools you should need are a sprue cutter (or a sharp knife) to cleanly detach the plastic parts from their sprues.
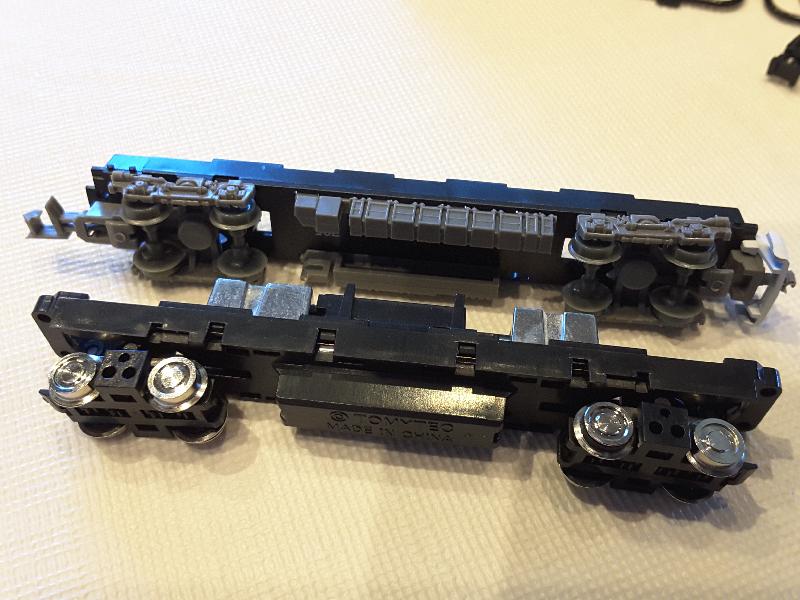
Now we have some decisions to make. We place the old and new chassis in line with each other so we can compare things. The conversion kits are generic, and meant to fit a number of models, so we need to reconfigure the motor chassis to have the same dimensions as the old plastic one. In particular, we need to pick one of the three chassis extenders (you might not use the same length on either end, by the way) and in light of that, we need to pick how much extension we need to give the truck-mounted couplers. The new couplers slide in place on a dovetail-like groove, but we can also extend that with either the short or long extender if that’s necessary to clear the car’s body. Experimentation will be needed at this stage, with trial fittings of the body on the motorized chassis. (By the way, even though you’ll not use all the parts, hang on to them until the entire conversion—including any trailer cars—is completed: you may need to fiddle with inter-car spacing, for example, either by using different chassis extenders, or coupler extensions... something you won’t be able to do if you’ve discarded the extra parts already.)
Once that’s done, select the appropriate truck frames. Once removed from the sprue, these just press on the truck—note the three holes on the naked truck.
(Yes, I noticed that while I picked the correct truck frames, I put them on the wrong side for the photograph... I’ve swapped them since then.)
| Final Inspection |
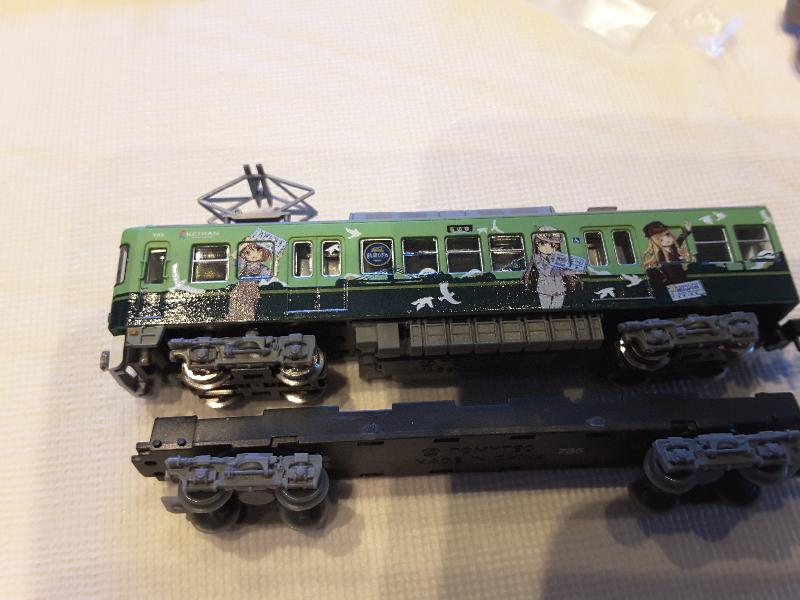 |
Once you get the things to work, all that remains is to transfer the underbody detail, and the front and rear skirts from the old chassis to the new one. (This is one thing the motoring kit does not provide, for obvious reasons.)
Conversion of the unmotorized trailer (if your model has one) goes roughly the same. Naturally, the chassis does not have a motor, but comes with a couple of metal plates to add weight (necessary for proper performance.) Once you’ve done the motorized conversion, this one is a snap, too... but you will need to try both cars out together. Arnold couplers tend to put too much space between cars, so you may feel like experimenting with shorter coupler extenders to bring the cars a little closer together (but that’s up to you.)
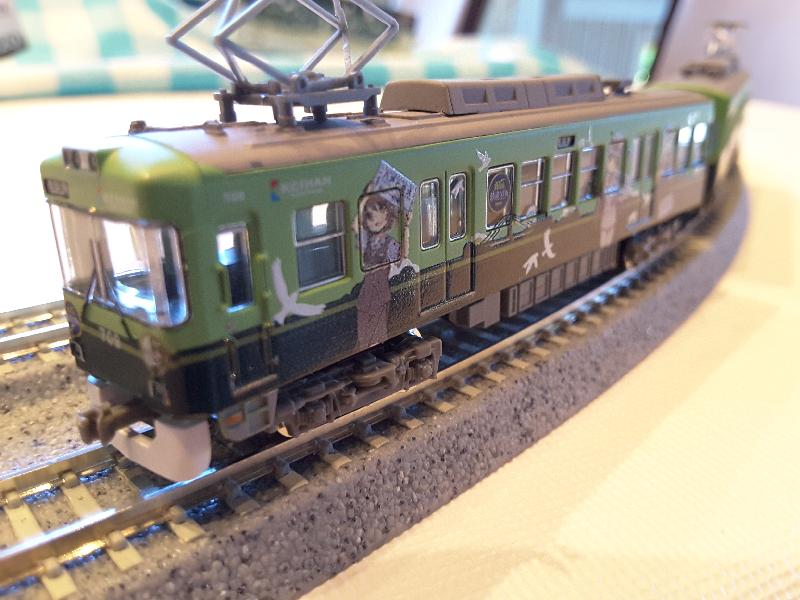
For both the conversions I’ve done so far, the motorized chassis works really quite well. The heft of the weighted trailer makes the thing feel more like a “real” model, and my daughter is tickled by the prospect of running “her” train on "her” layout.
| Conversion Complete |
 |
Wrap Up
It is fairly easy to convert static Tetsudo Collection models so they will run like ordinary N Scale trains, given that a conversion kit exists for the specific static model.
The resulting unit runs fairly well. The motors are smooth, and have good running characteristics; one assumes this will only improve after the usual break-in period.
The original models themselves vary in quality. The printing, for example, is good, but not excellent, compared to the Tomix line of trains. In the models I have, external details, like the pantographs, are plastic rather than metal (the latter being more delicate and to-scale.) Of course, improved pantographs are available.
From the total cost perspective, there’s not much of a benefit here: the static model + motorizing kits usually exceeds the price of a similar actual N scale train. With Tetsudo Collection models running in the $20-30 range, and power unit + trailer kits adding another $40 or so, we’re clear of $60 for a 2-unit train.
Where things do look more interesting is when you consider the incredible variety of models the collection consists of: smaller, limited runs and special “ad wrap” editions which may not exist elsewhere.
Also, for the collector that has started out with these plastic models, but is transitioning to the running of trains dimension of the hobby, this is a cost-effective way (or even, the only practical way) of taking some favorite models and allowing them to trundle down streets and countryside under their own power.
Or maybe, if your daughter sees one she likes, and you really want to bring out the otaku in her... ;-]
Update
Rumor is that some of the earlier motorizing kits weren’t so wonderful. My experience has been favorable both times I’ve done these conversions. It would seem, though, I’m using the newer kits: a new TM-20 unit (item Code 259718 with a box printed with black ink) replaces a terminated earlier unit (item code 249573 printed with a blue ink.)

 Generate a QR code link to this page