— Thomas M. Tuerke
Long before there was ground foam for foliage, there was sawdust foliage. And we looked down upon our little worlds and saw that it was good.
And damn easy to make, from a cheap and abundantly available "waste" material. If you don't have access to a steady supply of sawdust "fines" (what with sawing anything around the house) then maybe a neighbor does, and will be happy to part with it.
| On Ground Foam |
| By the way, I don't mean to suggest that there's anything wrong with ground foam. Indeed, for a proper sense of "biodiversity" the wider the selection of scenic materials, the better. (And yes, one can make their own ground foam if they're so inclined, provided a source of foam, and a bit of hardware...) |
With a supply of sawdust secured, the only other goods you'll need are a dollar-store sieve, a dollar-store tea strainer, and an assortment of containers. Think quart-sized yogurt containers or plastic take-out soup containers, or something like that. These can be redirected from the recycling: remember, it's "reduce, reuse, recycle"... (these should be rinsed clean before starting their new life, of course.)
Oh, you'll need an assortment of natural tints of acrylic paint (think craft store tubes): greens, yellows, browns, oranges, even a maroon or umber... pick your palette based on the region and time you want to model. Just stay away from the super bright colors (or be sure you have some "muting" colors like brown or maroon to bring the greens down a notch back into the real world.)
In fact, you don't need a super wide selection, as you'll get more natural results from mixing simple colors: lighten a green with yellow, darken it with brown or orange. You can be precise and note your ratios, but you'll get a lot more natural variation by just mixing each batch as inspiration strikes. Nature's funny that way, too: it doesn't follow a color chart. What looks like a uniform hillside of trees is really a varied pastiche of similar colors.
Supplies in hand, the first thing to do is sift the sawdust. The coarse strainer should be useful to remove chunks of wood too large to pass as leaves. The tea strainer will help separate the really fine stuff (almost truly saw dust) from the larger chunks. Both varieties will be useful, in their own way.
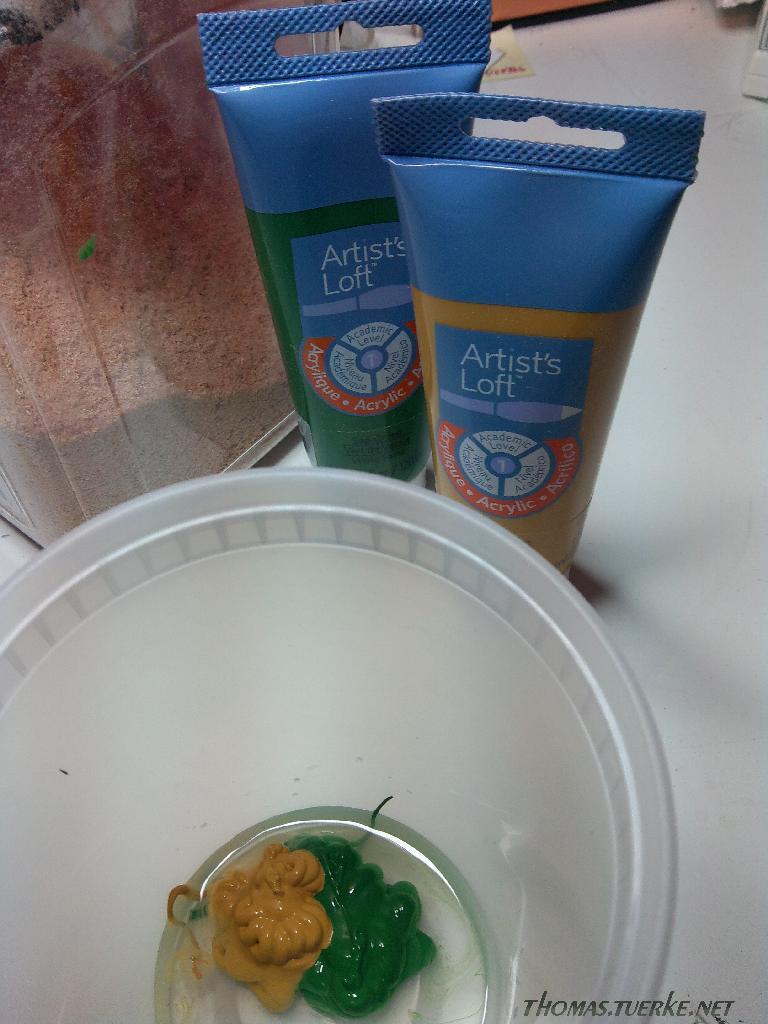
Select one of your rescued tubs, and fill the bottom with a bit of water. Not too much just now, we just want enough to motivate the colors to blend. This gives you the opportunity to eyeball a color mixture, and thins the paint enough to help the sawdust fibers absorb the color. If the paint is too thick, the pigment just cakes onto the outside of the fiber and makes a clumpy clod that really isn't useful for scenery. What you're looking for is a mixture that has the consistency—and opacity—of whole milk, not any thicker, not any thinner. Once you figure out the ratio of color (or colors) to water, use that ratio to fill the tub somewhere between one third to one half full, and stir out any clumps of undissolved paint. Don't get it any more full than that: we need room for the sawdust.
 | 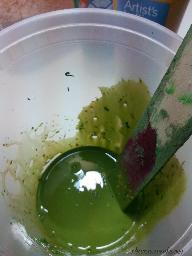 |
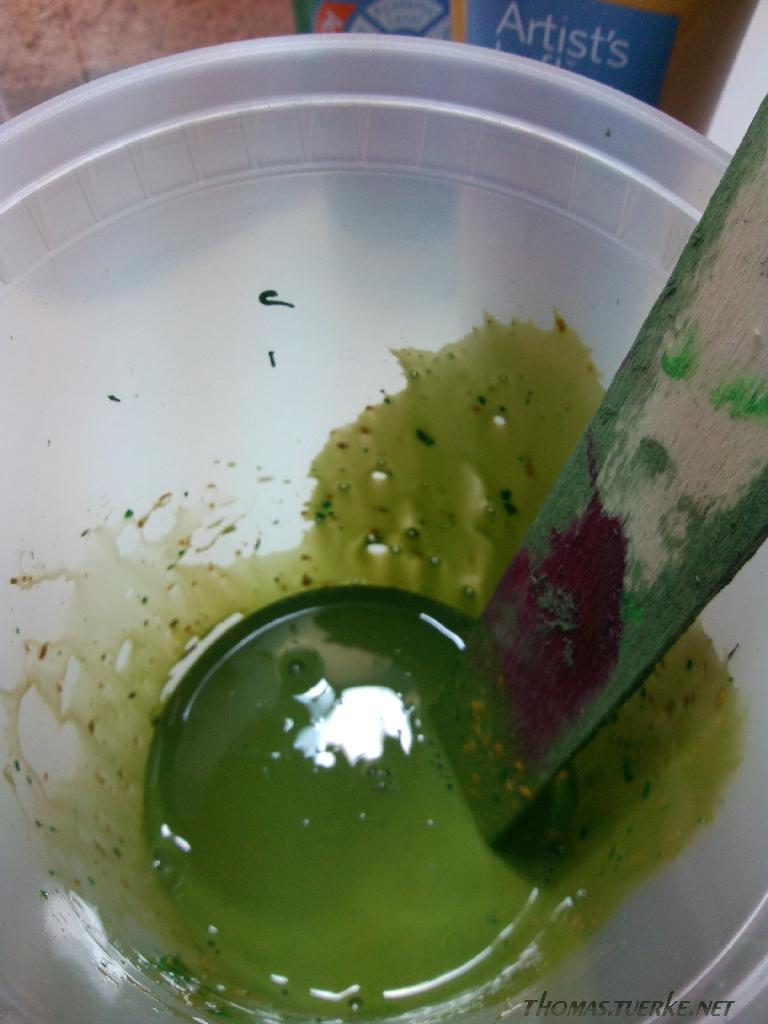
| About quarter of an inch (<1cm) of water in the bottom of the tub, then squeeze your paint into it. In this case, I'm using "sap green" and "yellow ochre" to make a lighter green | Stir well. Break down the full-strength paint to fully dissolve (note the chunks of paint on the side of the tub after a swirl or two.) The ideal consistency is that of whole milk. We add more water to get that. |
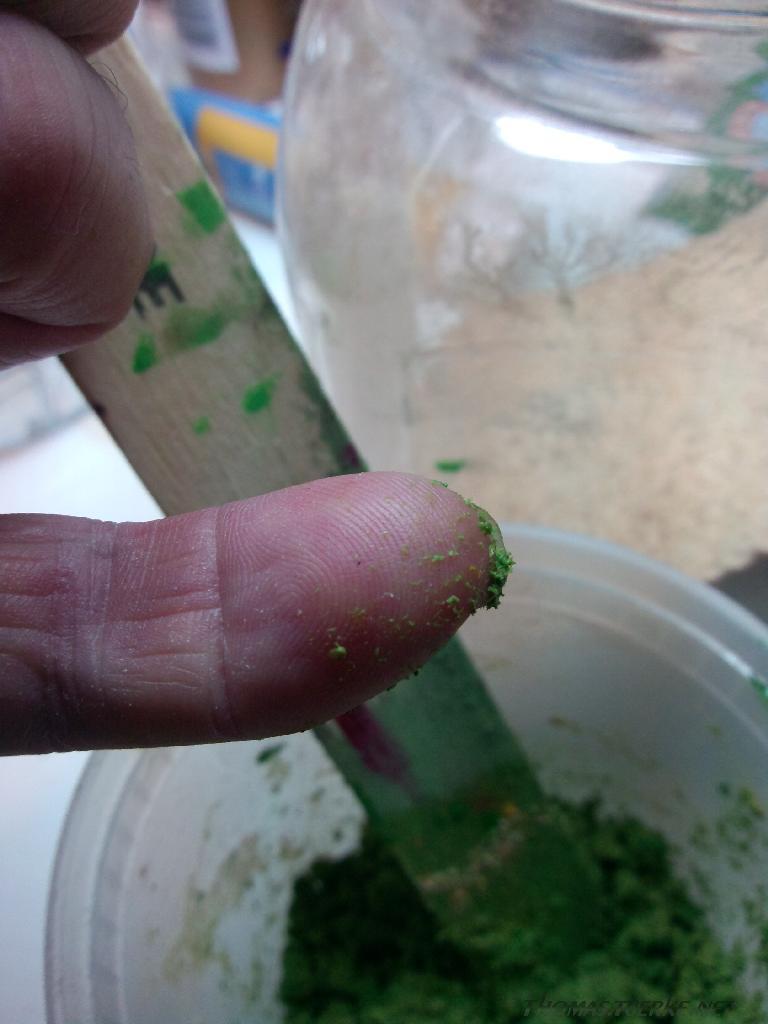
The next step is to start adding sawdust into the mix. The sawdust should be dry, and thus quickly start absorbing the liquid—including the pigment—deep within its fibers. Keep adding sawdust, stirring as you go, until the whole mass is uniformly colored and generally "dry". Use the touch test: if—as you press your fingertip into the mixture and pull it out again—it is only moist, with only a hint of color on it, the batch is ready. On the other hand, if your finger is wet and coated in pigment, that means there's pigment that hasn't been absorbed yet, and you can add more sawdust. (Naturally, if your stirring uncovers dry clumps, you may have added too much sawdust: keep stirring, and if that clump remains dry, add a bit of water to the mix to encourage a bit more "sharing" of pigment.)
 | 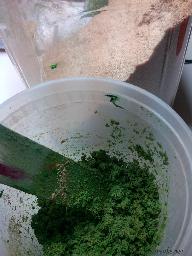 |
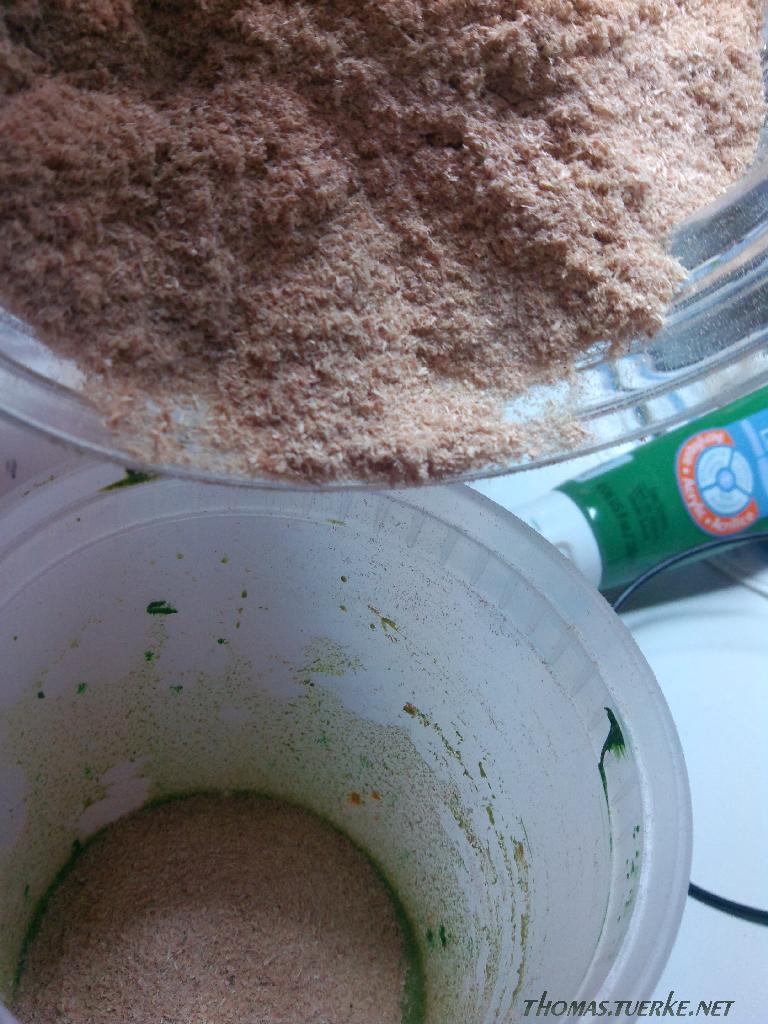
| Tipping in the dry sawdust. Add fairly quickly, and stir. You want to make sure all the sawdust gets its share of pigment. | After adding and stirring, the paste is still glossy, meaning you can still add more sawdust. |
| |
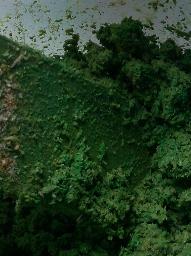 | 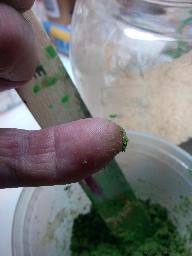 |
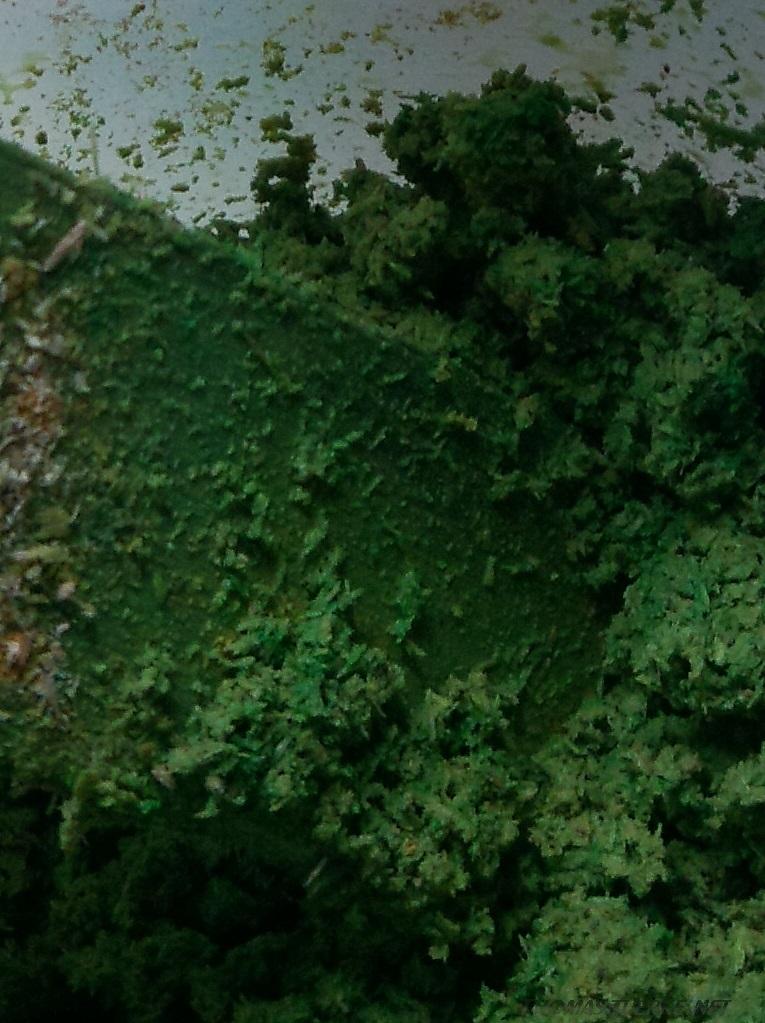
| A closeup shows the excess moisture. More sawdust, please! You'll be surprised how much sawdust you can add. | The finger test comes up clean: no paint sticks to a finger pressed into the mash. The mass starts to have a satin lustre. |
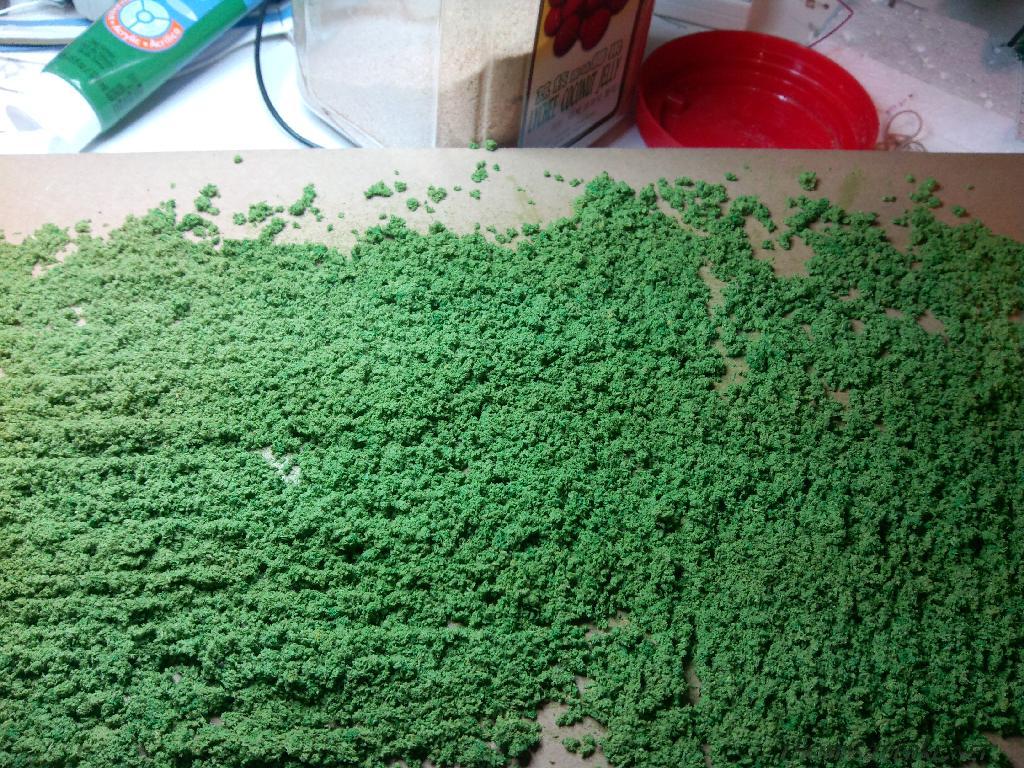
Once you've reached that sweet spot of not too wet, not too dry, tip the tub of sawdust out onto a paper or cardboard sheet, spreading it out and crushing any clods, and let the mixture dry completely. Some people accelerate that by putting it in the oven; I'm perfectly fine letting it air dry.
You're almost done: once dry, run your sawdust through the sieve again—mostly to remove any clumps—and store it away in another covered container. It's basically ready to use.
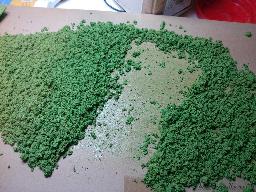 |
| When spreading out the sawdust to dry, you know you're in good shape when none of the pigment transfers to the paper or cardboard beneath. (This should come as no surprise, given the finger test, but you can tip it back into the tub and add more sawdust if it's not behaving.) |
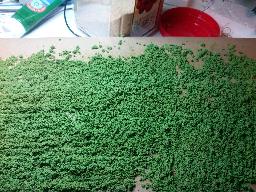 |
| Save yourself trouble later by taking care of the clumps now, while the mass is still soft. Shifting stuff around during drying avoids clods and clumps that have to be mashed though the sieve later. |
You may consider making several batches, in a variety of colors: scenery looks much better with the usual color variations—a little darker, a little lighter, a little redder, a little yellower—and you can pick and choose, mix and match, when you put your sawdust to use.
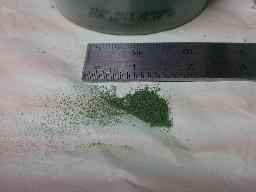
| Here's the kind of final product you can expect: |
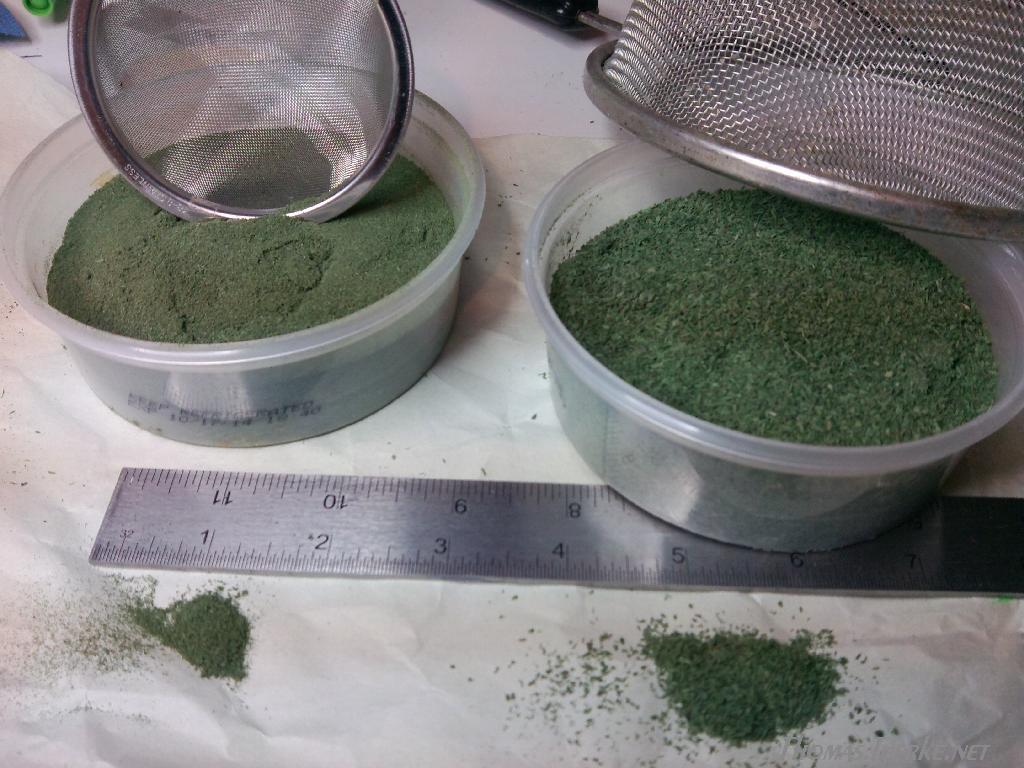
 |  |
| Tubs of fully processed sawdust, filtered into fine and coarse sizes; the sieves used to do the filtering are behind them, and a pinch of each are in front of them. | A closer look at the sawdust. The fine stuff is suited for lawns and shrubbery, while the coarse stuff looks remarkably good on trees |
| |
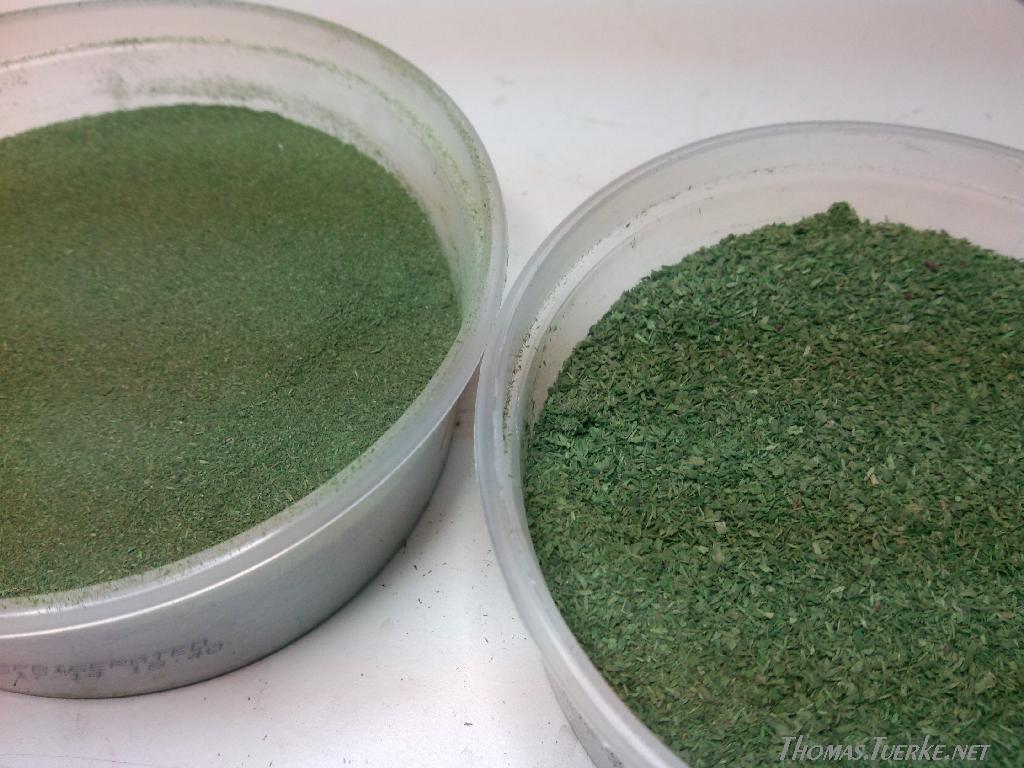
 | 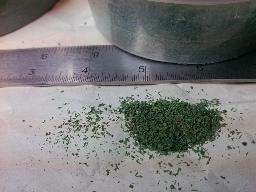 |
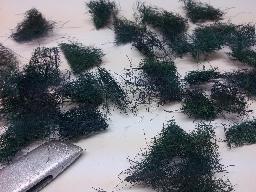
| The scale above shows ¹/₃₂-inch ticks (metric users: roughly 1 mm) for reference. The fine stuff is approximately 3-4 scale inches (around 7-10 cm) | The coarse stuff shown here is clearly much larger, roughly 8 scale inches (around 20 cm) in length. It has more irregular shapes, and shows more visible texture. This makes it good for leaves and needles (which is what we'll be using it for....) |
— Thomas M. Tuerke
| The Power of Suggestion |
Okay, so I took liberties with the suggestion that we would make a scale tree. We won't. We will make something that only looks like a tree. But our minds are willing to suspend disbelief and believe what we see. This is The Power of Suggestion.
Don't know what I mean? Take a look at a painting of a landscape. You may think you see trees and fields and mountains, but you don't. All you really see is some hardened paste full of pigments, arranged in very specific ways. Look closely. Do you see every flake of bark? Every blade of grass? Every twig? Every leaf, every needle, every pebble? Of course you don't. They're just not there. The artist suggested the trees, the grass, the earth with judicious use of brush and paint, and left the rest for your mind to fill in.
That's what we'll be doing, too. We won't produce an actual scale tree. We will, however, suggest "tree", and do so well enough that people will remark how real it looks. If you pardon the pun, that's the nature of making scenery at scale. |
One of the easiest trees to make is a Filter-kabob conifer, and despite the name, these actually look quite good in relationship to the expense—both in time and money—that goes into their making. Depending on the colors and textures you use, you'll be able to create redwoods, cedars, sugar pines, or nearly anything else.
Here's what you'll need.
- A smallish diameter dowel or a dozen: how many you need depends on what scale you want to represent, how many trees you need, and how tall you want them to be. For N scale, I use varying sizes between ⅛" and ¼". If you get lucky to find twisted or misshapen dowels, take those for the interesting character you can give some of your trees. (And if you're lucky, you might be able to get them for a reduced cost, because nobody else will want them.)
- A "natural fiber" furnace air filter. There are assorted brands, typically of the cut-to-size variety, consisting of some spun natural material, sometimes with a plastic mesh backing to help it keep its shape. If you already use such a filter, the cut-away part is now no longer waste, but rather, potential scenery. How's that for economical?
- Sawdust foliage. Pick a color appropriate for the trees, typically a darker shade of green.
- A razor saw if you have one, or else a stiff wire brush.
- A bit of glue: white, carpenter's, or what is called PVA in some parts of the world.
- Some clear spray adhesive: dull-coat or matte finish spray, or even hair spray (the cheaper the better: the cheap stuff is just lacquer anyway, which is perfect for what we're using it for.) In a pinch, dark brown or dark olive drab spray paint will do, too.
- A utility knife (with sharp blade, for whittling) or else some sandpaper. A belt sander is ideal, if you have it.
Trunk Forming
Cut the dowel(s) into individual segments. Since these will become the trunks, they should be about how tall you want the trees, plus an inch or so for pushing into the ground. For N scale, I'm going with 6 to 8 inches. Remember to vary the lengths of the individual trunks, too. Having each tree be exactly the same size is unnatural.
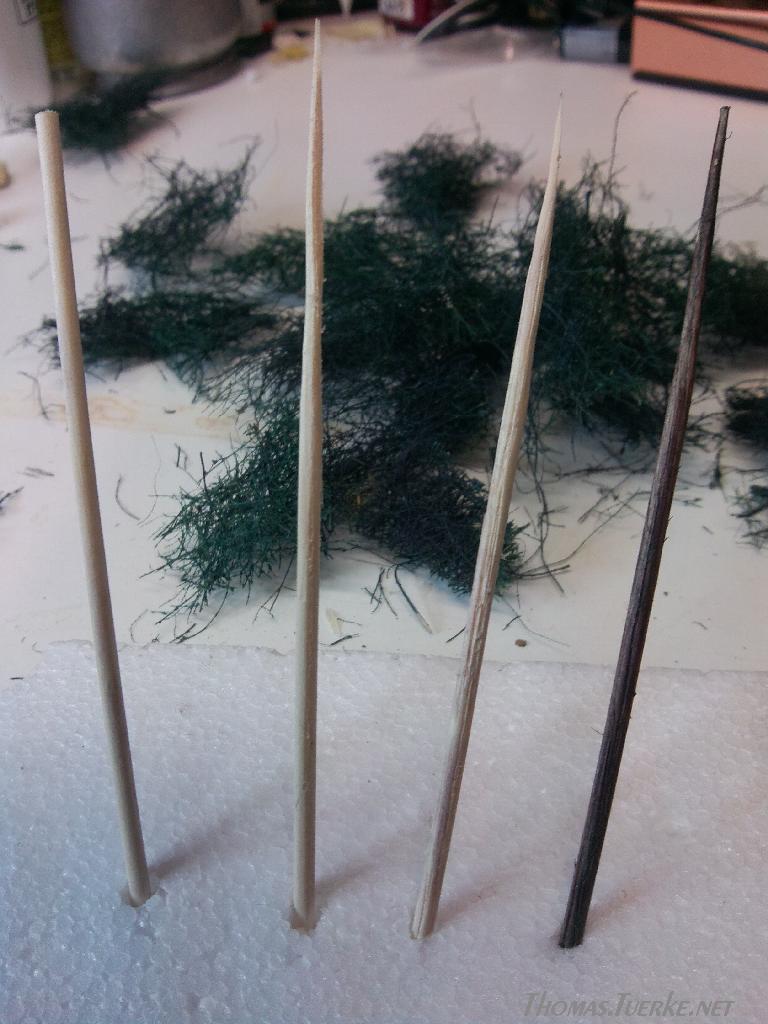
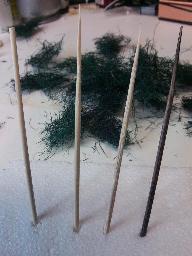 |  |
The stages of trunk development, kabob-style. From left to right:
1. Raw dowel, cut to length
2. Tapered. These early versions were done by whittling; sanding can be much faster
3. "Bark" scores, thanks to a razor saw dragged sideways down the trunk
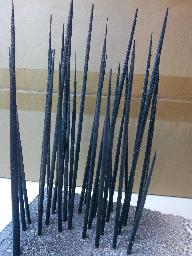
4. Colored trunk. It isn't brown (though it has some hints of it.) | No, not a model forest fire, but several dozen trunks, ready to be assembled into trees. |
The next step is to form the taper of the trunk: the tip should come to a point, and there should be a gradual taper down at least two thirds of the length. Either whittle using your knife, or sand the dowel to the needed taper. A belt sander makes short work of a forest's worth of trunks: start by pressing the tip onto the moving sandpaper to form a "sharpened pencil" cone at the tip, then gradually lengthening the cone down the length of the trunk. I made a couple dozen trunks in about 15 minutes.
This is a nice touch, but optional: take the razor saw and repeatedly scrape the blade sideways down the lower part of the trunk, doing so all around. This will give the smooth dowel some bark-like character (and somewhat irregular shape) that will show up later. If you have a wire brush, you can use that instead.
Now to color the trunk. I have a question for you: What color is a tree trunk?
If you answered "brown" you would be almost completely wrong. Don't feel bad: nearly everybody says this. Give a kid some crayons and tell him or her to draw a tree, and they'll grab the brown and green crayons. But look outside, and you'll see this is not so. Nearly every tree trunk out there is really mostly gray. Now, I'll grant you, a warm gray—a touch of beige or tan mixed in—but still gray. Sure, birch trees have whiteish (say "dove gray") bark, and redwoods and manazanitas have ruddy—even coppery-red—bark but mostly, you'll find various shades of gray.
And definitely not chocolate-bar brown.
So in light of this, let's give our conifers a base coat of flat black. Be light in its application: it doesn't need much, and it won't be the final color. Then, using a beige or tawny tan color, lightly dust (as in, spray from much farther away, say 18 to 24 inches) the trunks to lighten things up with a warmer tone. You can also do some dry-brushing using these lighter colors along the trunk to highlight the bark you made with the razor saw. We use the black to accentuate the shadow that the trunk is supposed to be in, and break this up with the very light spray of lighter colors; the dry brushes suggest dapples of sunlight that actually reach it through the branches and needles.
With that, we can set these aside for now. Sure, it may look like a forest fire hit our tree assembly area, but that'll change.
Filter Boughs and Branches
The next step is the filter. While you can use a pair of scissors, a utility knife is probably better for this job. You'll be dismembering the filter, cutting it into small irregular shapes: triangles, rectangles, trapezoids. Using a knife, you'll invariably end up ripping some of the material, giving you the much-desired irregular edge. Nature (of the biological kind) abhors a straight line.
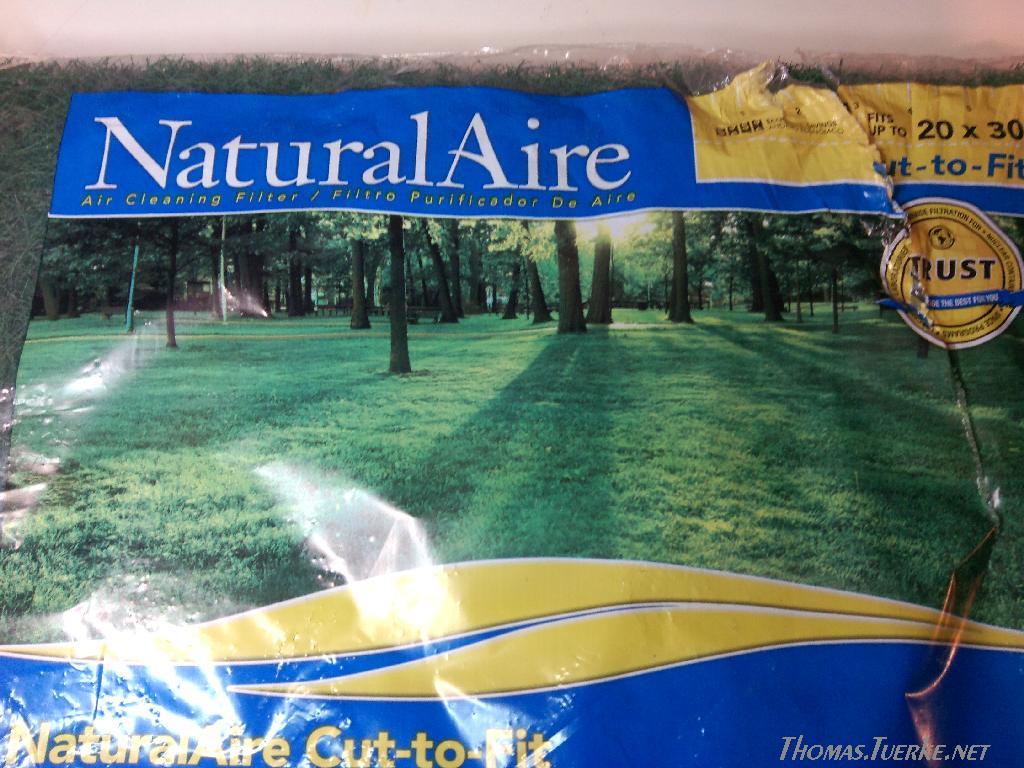
 | 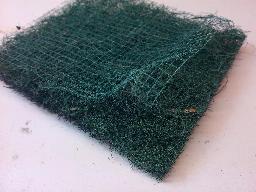 |
| One brand of "natural fiber" filter. The filter is already green (though somewhat artificial looking if you ask me.) There are many brands that offer this sort of filter; remember: you want natural fiber. | The product I used had a synthetic mesh to keep the natural fibers flat. For a filter, that's goodness. For our use, not so much. |
| |
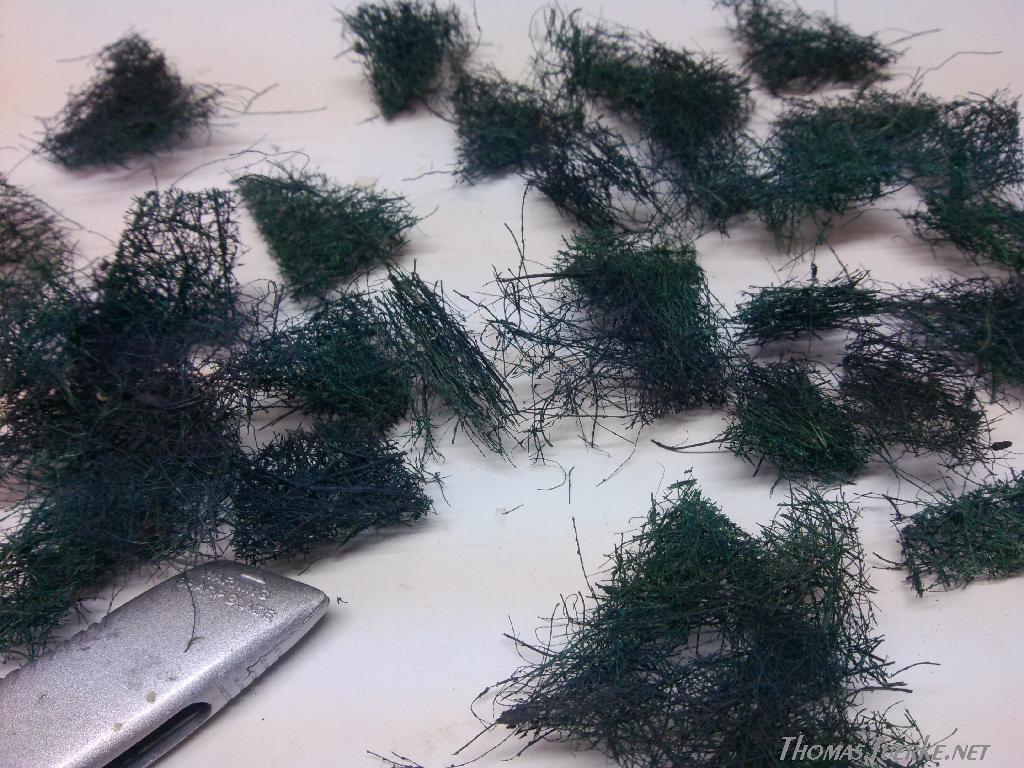
 | 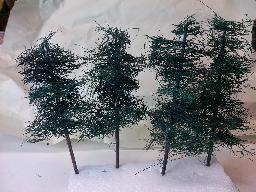 |
| The square is chopped up into pieces of varying sizes and shapes. The size you pick will depend on your scale, and overall size of the tree in that scale. If in doubt, go for smaller sizes: it's easier to explain a somewhat smaller tree than one that is clearly too large. | Assembled (but not yet "flocked") trees. Once you've made your kabobs, you may want to trim the filters a bit to provide the shape you are looking for. Don't go crazy here, though: nature isn't perfect, and unless you're modeling a manicured forest, your models shouldn't be, either. These are starting to look good, but they're still a bit straggly, even gangly. |
| |
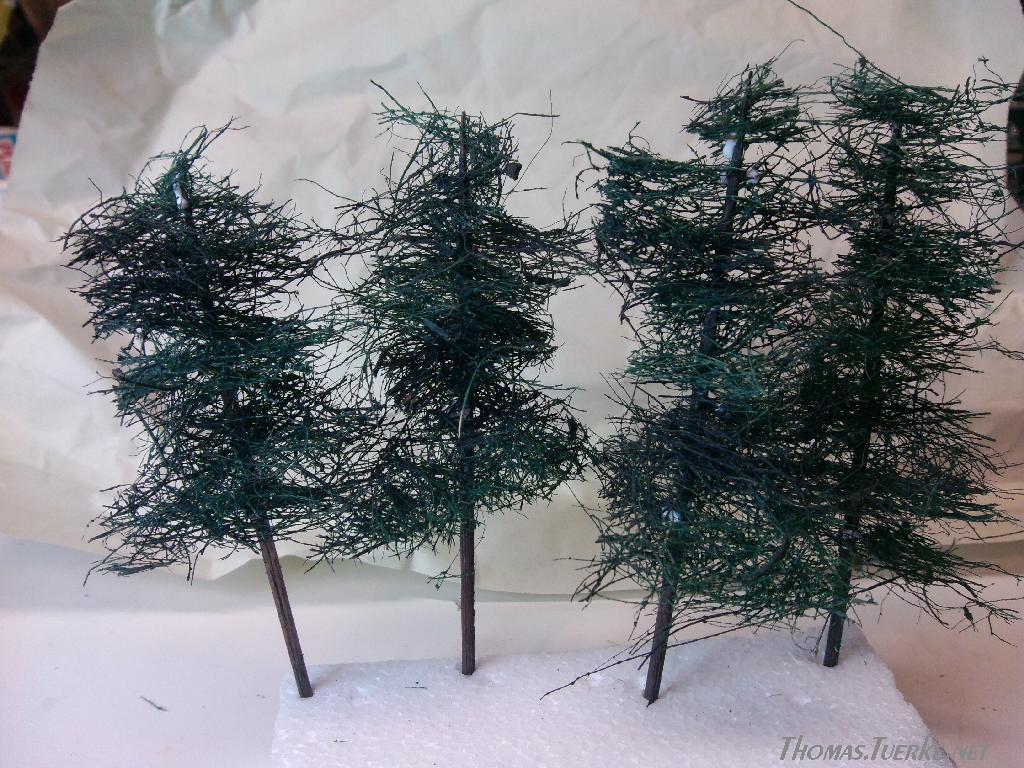
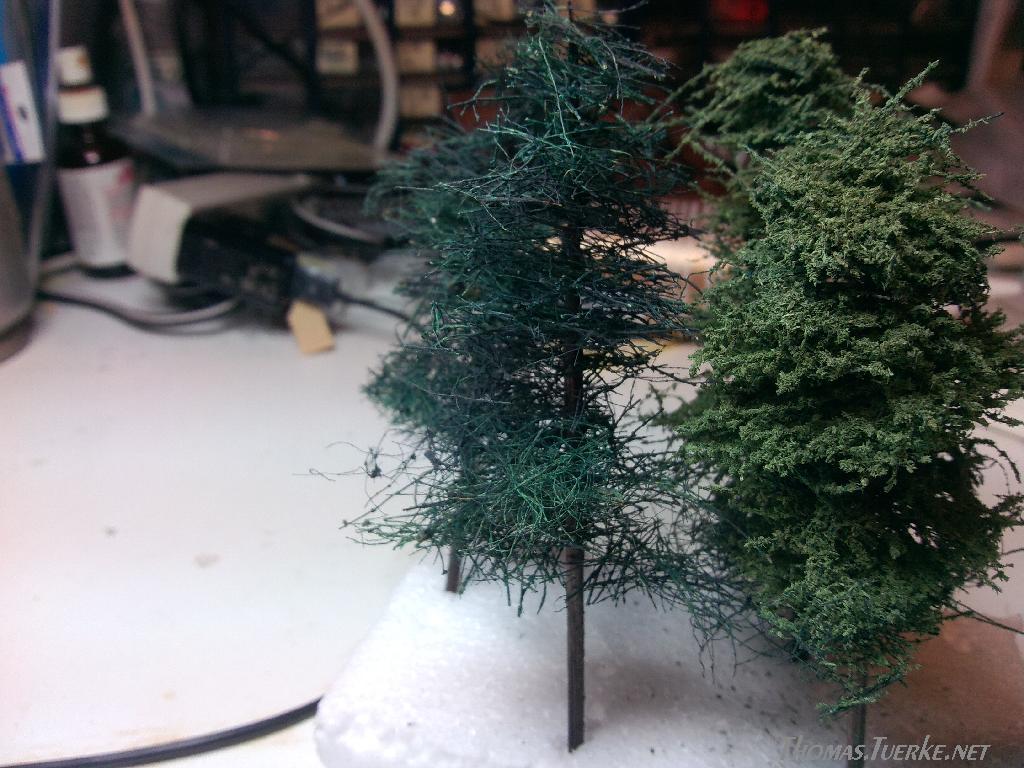
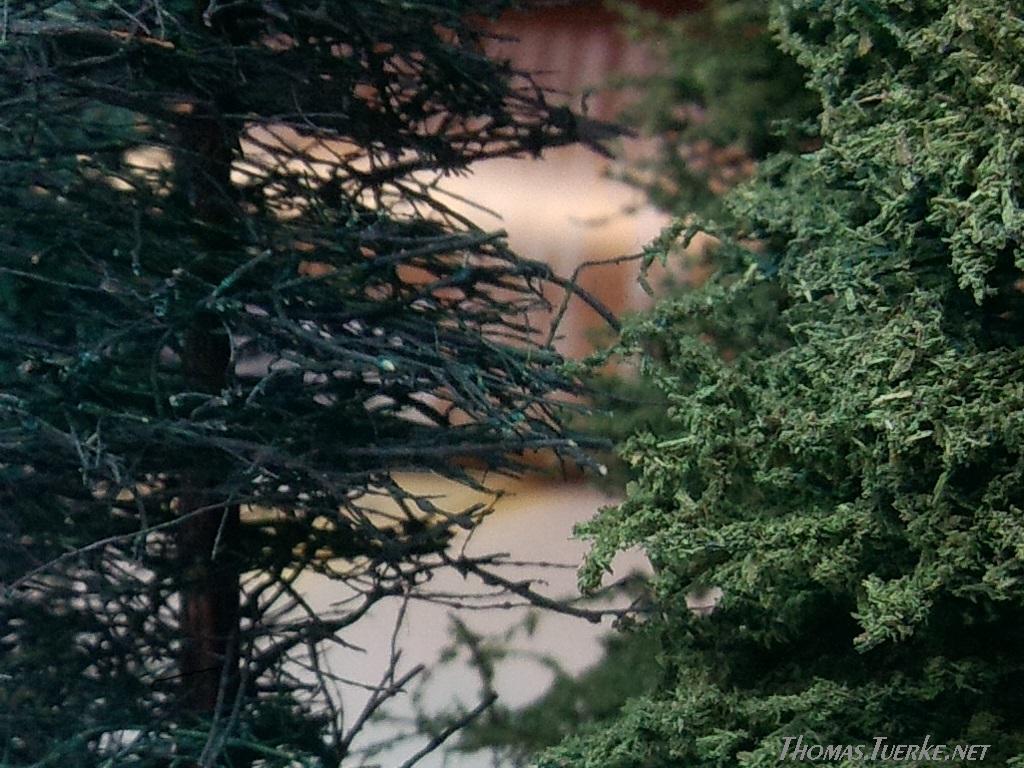
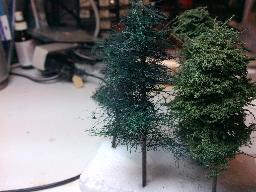 |  |
| What those traggly trunks need is some needles. A dose of our sawdust is just the thing: spray down some adhesive (even just the right colored paint) and sprinkle the sawdust. Less is more. | Here's a close-up of the before and after: the tree on the right looks pretty convincing as a conifer, and best of all, it's really an inexpensive way to build out a forest. |
It's probably best to work in manageable chunks. For example, I cut an 8-inch square out of the filter, and chop that up, yielding enough material for 4 or so 8-inch trees. I repeat this for the number of trees I expect to have time to make.
Once I have my assortment of shapes, I further tease these apart, pulling the top from the bottom. This gives even more of an irregular form—and greater "loft"—to the trimmings, which results in a more delicate, natural-looking tree. The stuff I have is a (barely) passable green, so I tone it down with some more cheap flat black paint. I've seen some products that are a completely unnatural blue. While usable, a good dose of dark olive drab and/or flat black is definitely called for with that.
Next, I recommend sorting the bits into large (around 2-3 inches/5-8 cm), medium (at least 1.5 inches/3-4 cm), and small sizes. You can come back and make as much of this stuff as you anticipate you'll need, but only after you've made a few trees to get a sense of how much you'll use for each tree.
Which leads us to our next step:
Assembly
This part goes fairly quickly. Grab a trunk, and apply a short dash (about an inch/2-3 cm) of glue near the base of the foliage (this might be about one third to one half of the way up the trunk for anything other than a sapling) and select a first piece or two of filter bits—starting with either large or medium—which you lance with the pointy tip of the trunk, and push down so it's on the glue. These lowest branches, and a few above them, will be some random mixture of large and medium sizes. Repeat the glue-and-lance operations, working your way up the trunk; as you do, you'll use fewer large and more medium bits, and eventually introduce some—then more—small bits, until you reach the tip. The important thing is to not create a simple cone, nor a bunch of compact and regularly-spaced layers of filter material.
The kind of tree you're trying to imitate will also determine how you lance the material onto the trunk. Some varieties, like redwoods, have branches that droop downward, so you may lance filter bits off-center with the longer side hanging down. Other varieties of trees, like pines, have branches that grow upward, so you may favor more smaller oblong bits of filter lanced so the long end is higher than the trunk. And so on. But if all of that is too much to think about, just content yourself with lancing the filter bits somewhat centered, and somewhat level, and you'll have a perfectly good looking tree.
Almost.
A dusting of Foliage
The final step—the part that really makes the tree look good—is the application of the sawdust we made, representing the needles. There's something really rewarding about the finished product that makes this the most fun, too.
Here's how:
Get out the sawdust (coarse works best, I've found), a tray to capture the mess, and that cheap hair spray, dull-coat, or even drab paint. While holding the base of a tree in one hand, apply the spray from above with the other. Set down the spray, and immediately pinch some sawdust, sprinkling it over the still-wet tree. You can vary the "transparency" of the tree by how much sawdust you apply. I recommend going easy on it at first (it's easy to give it a second dose later.) You want to disguise the filter material, but not completely obliterate it, so you can see the branch-like effect of the filter, and make still out the trunk. Set the tree down into a sheet of styrofoam, and lather, rinse, repeat.
In not much time, you'll have your forest.
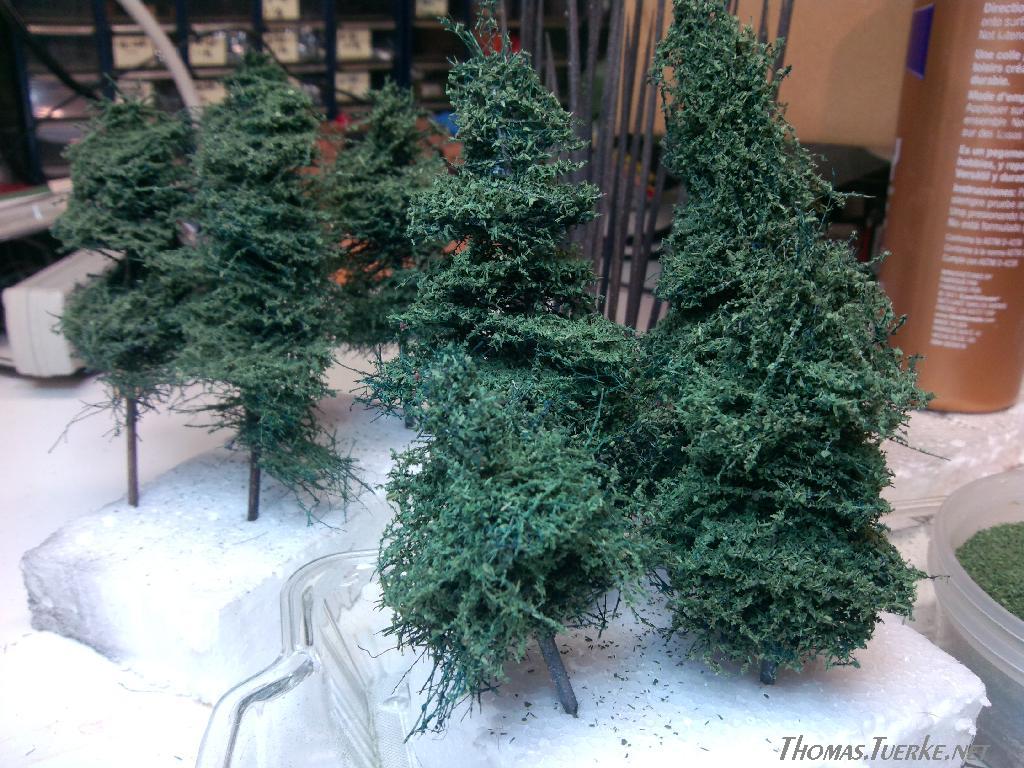
| Lo and behold, a forest in the making! |
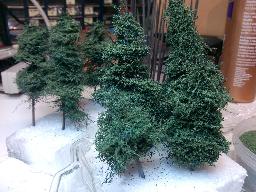 |
| These are early efforts, and with time I've gotten better at knowing what I want and don't want. For example, these are too tightly packed and flocked. Fine for the background, deep in the woods, but going forward, I'll make them less straggly and much looser. I want to see the trunk in more places. |


 Generate a QR code link to this page